OWASP ZAP - Passive Scanning - Get Started
Post Date: 2015-03-26
OWASP ZAP is an excellent (FREE) tool to test your website for common security issues. It has a large library of plugins and an what seems to be an active community. Although the tool has an active attack method, I prefer the passive attack method as you can use the site as you normally would. Although tutorials do exist on how to get started, I personally had difficulty finding them or knowing what I was even looking for when I first started. Especially related to passive security scanning. The interface isn't the most "intuitive", so I figured I would write these instructions for anybody encountering the same problems.
What is Passive Scanning?
Passive scanning reads and records all of the traffic between your browser and website, this would be the POST's/GET's and their responses. Because at the end of the day that is all there is when interacting with a website. (HTTP anybody?) ZAP runs its analysis on this data and looks for known issues within its library of attacks.
How does it do it?
In one sentence. Proxy with a MITM (man in the middle) for secure traffic. When you startup ZAP, a proxy server is started in the background that you can direct your browser to use.
So, to get started with your Passive Scanning, here is what you do.
- Download & Install OWASP ZAP (fyi you need Java installed) - here
- Startup ZAP
-
Startup Firefox (yes you can use other browsers), we will need to force all traffic through the ZAP proxy that is now running in the background. All of these sub items are in Firefox.
- Open Menu (Tools)
- Options
- Advanced (top tab)
- Network (sub tab)
- Connection - Settings (button)
-
Change your settings here to the following

You can see here that the ZAP proxy is assumed to be running on localhost:8080, if you have a different setup adjust accordingly.
- Click OK and OK to get out of FireFox Options.
-
Type in the URL of the site you are aiming to test (only scan your own sites)
- Note: If you have 2 monitors I like to put the browser in one, and ZAP in the other.
- If things are working correctly, you should see your first request pulled into ZAP, here is what I'm seeing
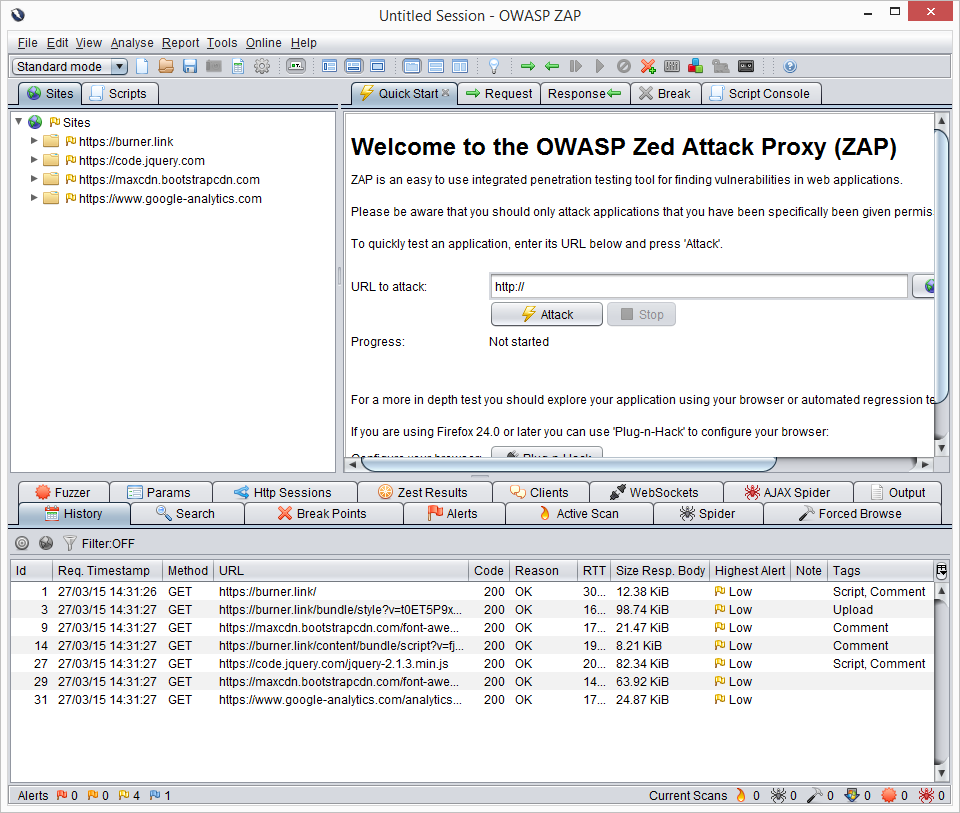
There is a lot going on here, but that main points are:
Sites Tab
This list should automatically fill as you browse the site that you are scanning, it will include any and all calls done by the browser. In my case you can see we use a few CDN's and Google Analytics. You can crack this open to get more details.
History Tab (below)
This is a play by play on each url, you can highlight one of these requests and view exactly what was happening in the Request, Response tabs up above (top right section). Also of note here is the Highest Alert column in the History Grid. This will let you know if you have any kind of issue with that specific call.
Alerts Tab (below)
This is where the value of ZAP comes in, as you browser your website all of these lists grow and are analyzed on the fly. You get a nice organized list of possible issues with each request, grouped and flagged accordingly. You can crack these open and click on the request to get a recommendation from ZAP on what to do. Note: Each one of these recommendations is ultimately for you to judge on based on your codes and needs.
So there it is, how to get started Passively scanning your website with OWASP ZAP, hope it helped.
Jason Brozek